Bonsai update

I went through a couple weeks ago and took photos off my current “Bonsai” collection. They’re still quite young, but growing very nicely. The gallery is here. I think a couple of my other plants snuck in there, too. I’ve got a spicy pepper plant that’s doing really well this year.
Notable plants include this Jacaranda, which is one of a family of around eight that I have:

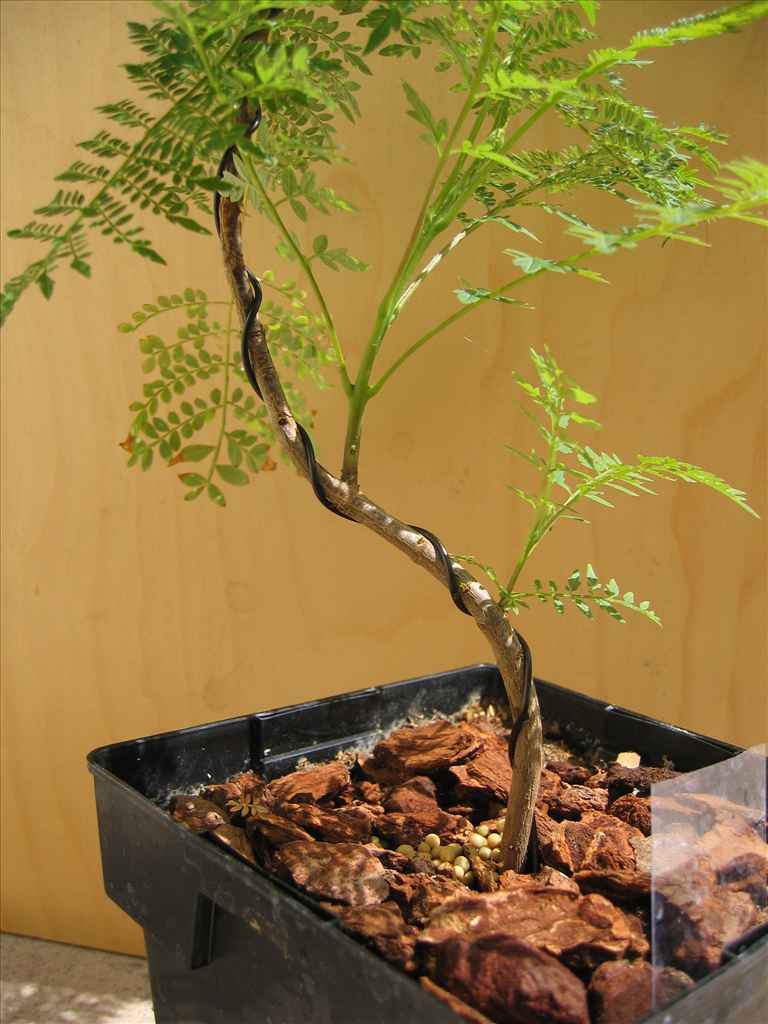
It has some really nice growth along the trunk that’s hard to get going on a Jacaranda (in my experience).

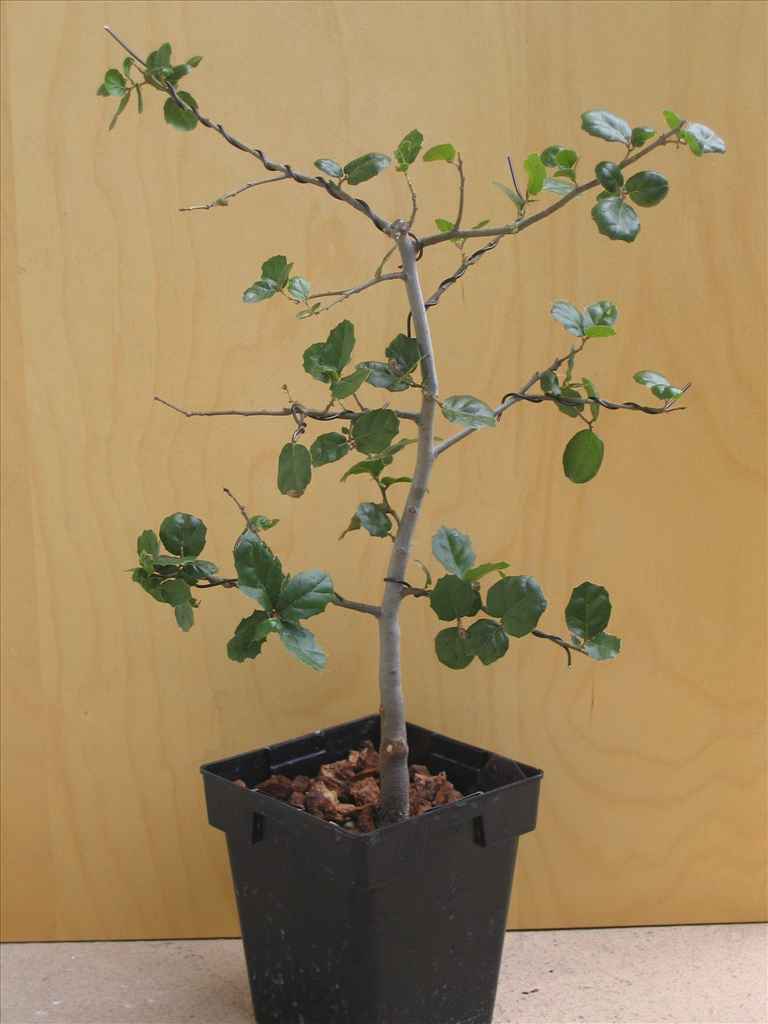
Then there’s the Oak I bought at a bonsai show last year. It was on the bargain/junk rack, and I liked it. It’s coming along nicely:

I’m fond of my Dwarf Pomegranates, as well. I’ve grown them from seeds, which I got from the fruit of a co-worker’s tree. I have five of them, but this one has been outside most of the time, and is looking quite strong:

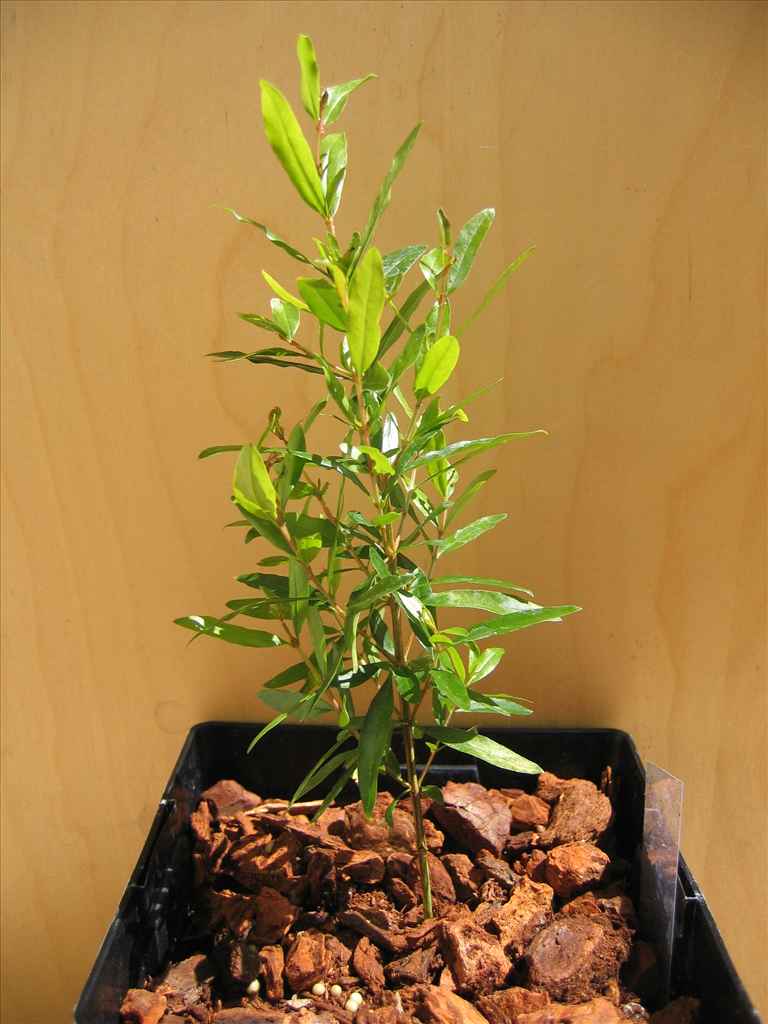
I’ve got some nice Lilikoi growing (that’s Passion Fruit), too. I got the seeds in Hawaii over Christmas, and I was unaware that they are actually a vine. So I put in some effort and planted them in a nice planter with a small trellis to climb up. I’m working on a Japanese Boxwood that I bought at Lowe’s, too, but I haven’t quite figured out what I want to do with it yet.

At any rate, it’s starting to be a pretty big collection. I’m gonna need a more space pretty soon!

That’s right. Lye. It’s the traditional way to make soft pretzels, but for liability reasons, cooking shows can’t tell you to use lye (I guess). It’s also kind of a bit of work to get ahold of. But without it, your pretzels will taste like they’re missing something. It also gives them that gorgeous golden color:

The recipe to use is the one from Alton Brown (of Good Eats fame). Instead of using baking soda as he suggests, use 1 oz. of lye crystals to 1 quart of water. I used double that because I had a big pot. Get the mixture to a boil and drop each pretzel in the solution for 30 seconds before you glaze em and bake em.

A couple other things of note I came across while making these:

  1. Don’t forget the melted butter in the dough recipe! I forgot it in my second batch and the pretzels just weren’t the same.
  2. If you love butter (like I do), use it to glaze the pretzels instead of the egg mixture. It’s oh so yummy!
  3. Once you’re done with your lye solution, don’t leave it in the pot! I made the mistake of leaving it in a non-stick pot overnight, and it made the non-stick coating… unstick itself!

Anyways, I gotta give it to Alton Brown. His recipes are always a delight.

I recently made dragon beard candy (view my photos). It turns out it’s a lot easier to make than hand pulled noodles, but the general process for both is the same. The reason dragon beard is easier is because you can really take your time while making it, and it is very forgiving about mistakes.

So I started by watching this video. Then I did a bunch of research on candy making. There are a few things to watch out for:

  1. When heating to a specific temperature, accuracy is very important. A 5 degree (Fahrenheit) difference can change your candy completely.
  2. When cooling your candy, it is in danger of crystallizing. Stirring it or bumping it can cause it to crystallize, so be careful.
  3. You can protect against crystallization by adding vinegar or corn syrup (or both) to your recipe.

Then I experimented a bit with the recipe in the video. I found that:

  1. You don’t need that much water. The goal is to boil it off anyways.
  2. Cooling the sugar to 100 C (212 F) before pouring it is a good way to crystallize your sugar and ruin the batch.
  3. It’s easy to crystallize the recipe anyways. Because of this, I modified it a bit by adding some extra corn syrup.
  4. Finally, the recipe is WAY TOO BIG.

So following all that, the recipe I had the most success with is this:

Dragon Beard Candy

  • 50g Maltose
  • 500g Sugar
  • 250g Water
  • 1/2 tsp White Vinegar
  • 100g Corn Syrup

Combine all the ingredients in a large pot, and boil. Once the temperature reaches 266 F, remove the mixture from the heat. Allow it to cool enough that the bubbles disappear and it becomes transparent. Rather than letting it cool to 212 F and risking crystallization at a low temperature, pour it into small cups immediately. I used little paper Dixie cups, and they didn’t burn or melt. Be careful in your cup choice though, as I used some with a plastic coating that made things a little more difficult.

Pulling the candy is pretty straighforward. Youtube videos are a great help for learning how to do it. Remember to take your time, because the candy CAN break. If it breaks when its still a large diameter, most of the time you can just stick the broken pieces back together by pressing the ends together (sugar is good at sticking to itself). If it’s really thin and you get a few broken strands, don’t worry about it. If you just keep pulling it will work itself back in.

For the peanut mixture, I used peanuts (toasted and ground in a blender or food processor), sesame seeds (to taste), and a little bit of corn syrup to help it stick together nicely. The corn syrup allowed me to get a big pile of peanuts in each dragon beard candy. I like lots of peanuts 😀

Again, here’s a photo gallery of the pulling process. It was really a lot of fun to make, and it was A LOT easier than making hand pulled noodles. So if you’re getting stuck trying to make noodles, take a break and make some candy for a while.

Since there’s been a lot of traffic on my Hand Pulled Noodle Posts, I’ve put together a web page with all the info in one place.  I’m probably going to move on to another project in about a month, so if anyone has an feedback or requests for what should be there, let me know.  After that I’ll be available to answer questions (which I’ll probably put on the AQ page) through email or on my blog posts.

Check out the webpage here.

Stand Mixers

UPDATE February 8, 2009 – I’ve put together a Hand Pulled Noodle webpage with all this info in one place.

I finally did it.  I bought a Kitchen Aid Pro 600 stand mixer.  I got it for a sweet $320 from Bed Bath and Beyond (I finally found a use for the 20% off coupon they keep sending me).  

I recently gave a noodle pulling demo at a nearby culinary school, The Professional Culinary Institute in Campbell, CA.  The folks there had used my dough recipe to get something pullable, but they wanted to see the pulling live.  So I headed over on wednesday.
Now up to this point, I had been mixing my noodle dough by hand.  I’m an old-fashioned guy, and doing it by hand has always suited me.  But as anyone who has actually made the dough knows, it takes a lot of work to get it pullable.
So I showed up at the school, and they had already mixed the dough up using their mixer.  I expected dough on the order of what I have at home.  Instead I was surprised with the most stretchy noodle dough I’ve ever played with.  Totally amazing.  With this kind of thing, I can actually see myself pulling a giant wad of noodles instead of the current single/double serving of noodles you can make with my 300g recipe.
So I bought a mixer yesterday, made some dough, and here’s what you need to know:
1.  I quadrupled my noodle dough recipe.  This made a lot of dough, but I’m not sure what you’d end up with running the 300g recipe in a 6 quart bowl.  It just seem like too little.
2.  I put all the dry ingredients in the bowl, turned the mixer on low, and slowly added the liquid ingredients.
3.  While it was running, I added a little extra water.
4.  I ran the mixer on about speed 4 for 10 minutes.  Felt the dough, and then ran it for another 3 or 4 minutes.  After that it was pullable.
5.  I had to use some extra flour at the end to get the dough to a consistency that didn’t stick to my fingers.
The resultant dough was so nice that I was able to show my girlfriend how to make noodles, and she actually made some even ones.  To be fair, she sees me pulling a lot, but it only took her and hour and a half of getting her hands in the dough to end up with something edible.  Pretty good if you ask me.
Anyways, what I’m saying here is if you have a stand mixer, making hand pulled noodles will be a lot easier for you.  If you don’t have a stand mixer, think about it, but try to do it by hand first if you’re going to buy one.  That way you’ll really appreciate the time and work the darned thing saves you.

UPDATE February 8, 2009 – I’ve put together a Hand Pulled Noodle webpage with all this info in one place.

So I went over the translations I got for a post I made about a chinese video I found (special thanks to Rusty), and I came up with another noodle recipe that’s a lot easier than the two previous ones. I did two test batches (the first was too dry, and I botched it with too much baking soda). Here’s what I came up with:

-158g cake flour
-26g regular flour
-110g water
-6g vegetable oil or sesame oil
-2g salt
-1g baking soda
UPDATE 2009-01-29 — I’ve changed this recipe because it was a little dry.  The previous recipe had no oil.

Just combine all the ingredients together in a bowl until it’s pretty well mixed. Then dump it out and knead it til it’s smooth. Give it a short rest (10 minutes), and then the real work starts.
Put a little oil on your hands and knead start working the dough (follow the tips I give in my kneading video). If you knead it without oil, it will seem a little dry, but if you add oil it makes it feel like it could really end up stretching into some nice noodles. You’ll notice a big difference. Try it if you like. You won’t hurt the dough.

Anyways, if you spend some time watching the Chinese video I posted, you’ll notice that the way they knead the dough involves twisting it. I found this to be really useful in giving the dough a little exercise. Basically, roll the dough into about a 10 inch hotdog, hold a section of it in place with one hand, and then press the heel of your other hand into the free part of the dough closest to the part that’s being held. I made an illustration to help out:


I Hope that makes sense.  The goal is to cause a tear in the dough between your hands.  At any rate, I think this recipe is probably the best and easiest to understand. Flour for dough. Salt for flavor. Baking soda for texture. Oil for workability. Good Luck, everyone 🙂

Literally.  I got to the end of Fable 2, and was working on getting the rest of the gargoyle heads, when I dropped into Archon’s Knot, where my LAST gargoyle head was.  As I swam out of the water, my character bugged.  I could shoot a single bullet, so I got the gargoyle, but I can’t swing a weapon, and casting a spell acts like I never release the spell button.  The big hurt, though in this bugged mode, I can’t get into the menu to save (you know, because I got all the Gargoyles!).  So I wandered my way (no fast travel if you don’t have the menu) to a game master, loaded up spinnerbox, and exited so it would autosave.  Then I reset my Xbox.

Well, in saving my progress, I also saved my bugged character.  I’m locked in a mode where I can’t attack, can’t equip items, can’t save, can’t fast travel.  
So I guess I’m done playing Fable 2.  Shame it had to end this way.

I had the idea to check out google.cn today to see if I could find a lamian recipe.  Well, I found video of a cooking show in which it looks like they explain… everything?  I’m not sure, but there’s information about alkali in there.  I can’t read it, however.  I’ll have to get some translation done.

Here’s some screenshots of particular importance.  I need to call my chinese friends to see who can read it 😀


I had 6 hours of free time yesterday, so I decided to take some time to catch up on Xbox Live games.  I was figuring I’d land on Bionic Commando, but I tried the Braid demo first.  If you haven’t played it yet, and you’re like me, you probably look at the screenshots and go “meh”.  It looks a little… bubbly, I guess.  The name and the graphics don’t let on to how cool it is.  I immediately bought it after getting to the end of the demo.  Bionic Command will have to wait.

Maybe the reason I didn’t know what Braid was about was because it’s kind of hard to explain.  It’s sort of like Mario Bros. in that they have a princess and she’s “in another castle”, but the game is really about puzzles.  At any point in the game you can reverse time.  If you die, rewind.  The puzzles come into play largely by having objects that aren’t affected by time in the same way as your character.  There’s also an interesting story to tie it all together.  You get a little story at the beginning of each or 6 worlds, and then jump into puzzles.
From a technical standpoint, Braid is amazing.  When you rewind, everything goes backwards, exactly as you played it out, even the sound, which I’m really impressed by.  Playing things backwards is not something most software is designed to do, and the software geeks behind Braid have done a really good job.  And the thing about being able to play back your gameplay is that you automatically have a nearly perfect bug reporting and reproducing system, which makes debugging easier.  The game is smooth.
I don’t know.  After writing this I realize it’s really hard to explain Braid.  I bet they’re losing a lot of sales because of that.  If you’re a details type person, you can notice that they took a lot of time balancing the puzzles, working out the gameplay, and making sure it was technically perfect.  As far as Xbox Live games go, I think it’s one of the best (but I haven’t played Bionic Commando yet).  If I had a rating system, it would receieve 13 out of 14 bacon strips.

Holy crap. I don’t know how I missed out on this one all these years. I was reading last week’s escapist issue, and came across this article. “What kind of a name is ‘The Kingdom of Loathing'”, I thought.

I checked it out. It’s awesome.

The Kingdom of Loathing is a browser based pseudo mmo. Let me clarify. By browser based, I mean it runs in your browser, but it doesn’t use flash or fancy graphics. It’s all framed html, img tags, and a bit of javascript. A very plain UI. By pseudo mmo, I mean that you are playing alongside many other people, but they may as well be in parallel universes. You can communicate with them, give each other items, and apparently PvP (i haven’t checked it out yet), but on the whole you just play it alone.

All the graphics are hand drawn stick figures, and the humour in the writing is a lot like Douglas Adams; the humor is all in how it’s written on the page. For example, in the game, one of the quests takes you to The Misspelled Cemetary, where you fight Ghuols, Skleltons, and lihces.

And since it’s free, you should check it out. No, read the article, and then check it out. The guys behind this make their living purely on the donations, and they have an interesting story.