In my last post, I mentioned I’d be posting tool to create a simple photo gallery. Well, I finished it earlier than I expected. I’d like to talk about the workflow I designed it around, though, before just throwing a link out.
How To Use It
To use my tool, you’ll need the following:
- Microsoft .NET framework 3.5 installed. If you don’t have this, you can get it here.
- A website (or an http server) where you can post a folder full of files.
- Some photos you want to post online.
The general use case is as follows:
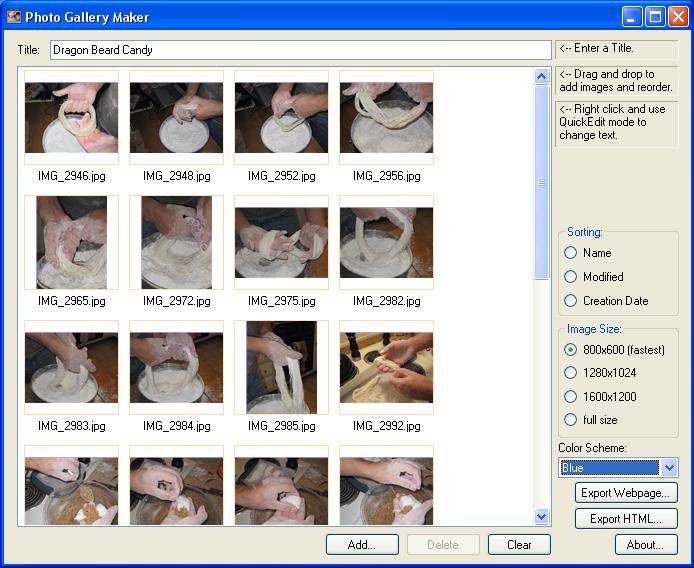
- Open up Photo Gallery Maker.
- Enter a title for your gallery in the title box.
- Drag photos into the large empty listbox. Reorder as necessary using Drag and drop or the sorting options available.
- Choose a color scheme.
- Click “Export Webpage”, specify an output folder, and click ok. At this point, the app will generate thumbnails and web ready images from your source pictures. It will also copy the necessary CSS and JavaScript files and generate the html for you.
- Once generation is complete, copy your destination folder to your
website. You can then link to the http path of the folder on your website to
view the gallery.
For example, if I generated the folder “photos” on my computer, and copied it to /www/galleries on my website, then I’d link to http://www.lukerymarz.com/galleries/photos or http://www.lukerymarz.com/galleries/photos/index.html.
Other Features
Now, there are a few extra features I overlooked.
- You can double click an image or select it and press enter to change the caption displayed under the thumbnail in the web page. You can alse do this through a right click.
- If you’d like a faster way to enter captions, select and image, right click it, and choose “Begin Quickedit Mode”. This will allow you to enter a caption for the current image. When you press enter or tab, the edit focus will move to the next picture and you can enter it’s caption. This will continue until you’ve entered a caption for all the images or clicked the mouse somewhere else.
- By default, the full size image will be 800×600. You can choose a few different sizes in the “Image Size” group on the right side of the app. 800X600 is fastest with HighSlide, but sometimes you just want a higher resolution.
- If you need to regenerate the html or choose a different color scheme for your gallery, but you don’t want to regenerate all the images, you can use the “Export HTML” button. It will do just that (copy the highslide files, the current color scheme, and generate a new index.html). If you’ve changed the photos in the gallery, use this at your own risk!
CAVEAT: You must have the .NET Framework Version 3.5 installed for this to run. If it’s not installed, you’ll get an error message when you start it up.
Anyways, I found this pretty useful for posting galleries to my website to share with friends.
Photo Gallery Maker version 1.0 can be found here.
Photo Gallery Maker version 1.1 can be found here. Read more about it here.
Drop me an email at lukerymarz@gmail.com if you have any questions.
[…] For more info, see the 1.1 post or the original announcement. […]